A subtle, rattling vibration near your feet while mowing isn’t just an annoyance; it is a warning. Ignoring it means risking a $2,000 tractor transmission repair over a simple $200 part. Equipment repair data reveals that catastrophic failures are rarely just “bad luck.” Rather, these blowouts stem directly from common installation mistakes that shorten PTO shaft life.
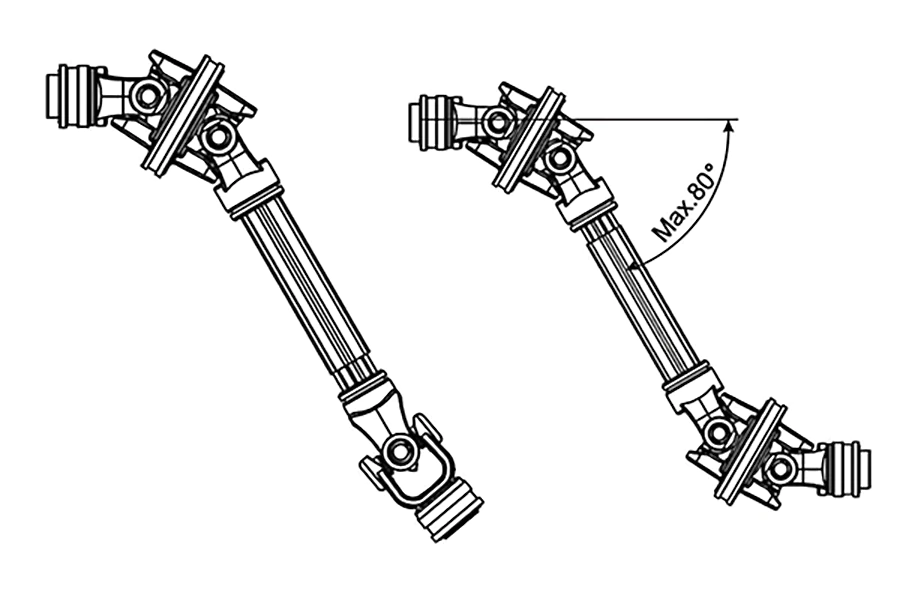
Think of this spinning connection like a human arm transferring mechanical power to your attachments. Your tractor is the shoulder, the telescoping metal is the forearm, and the universal joints act exactly like elbows. In practice, forcing an elbow to bend awkwardly under heavy loads causes severe physical strain. The exact same dynamic applies to your equipment, as poor installation angles create driveline transmission stress that quietly destroys internal gears.
Preventing this expensive damage doesn’t require an engineering degree. Spotting the top three PTO shaft installation mistakes protects your wallet and machinery, reducing vibration in tractor drivelines and ensuring years of quiet, reliable operation.
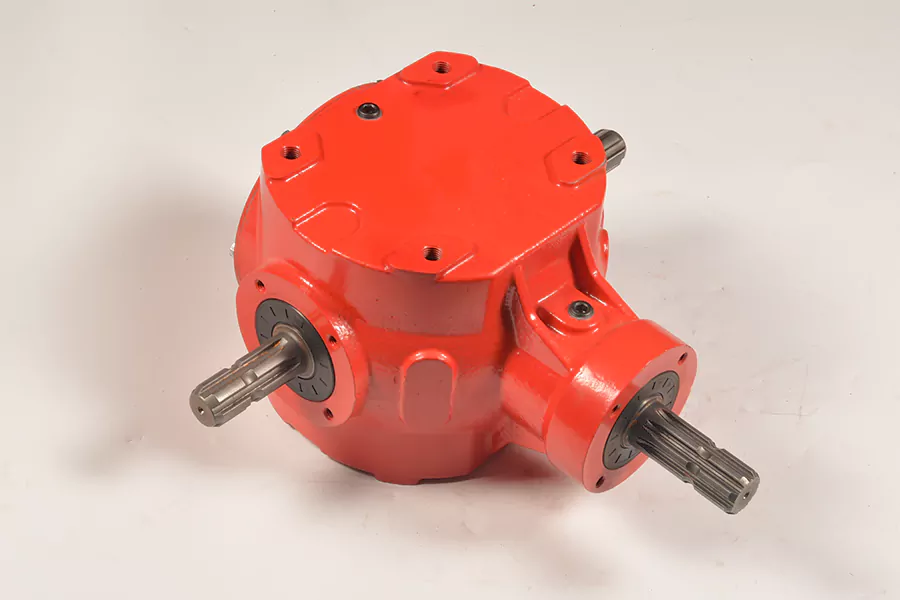
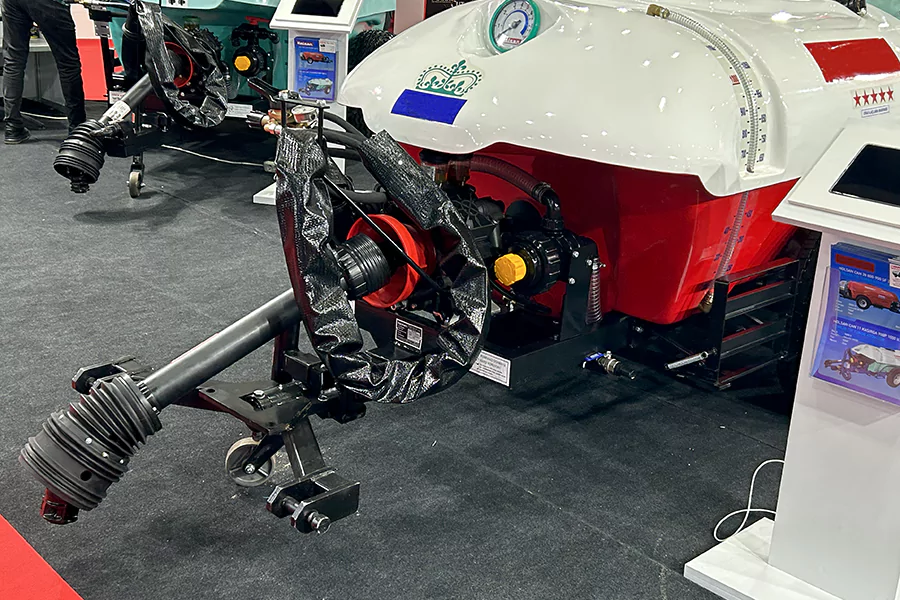
The Cost of a 'Near Miss': Identifying Your Shaft's Key Components
Identifying the metal doing the heavy lifting prevents the most expensive PTO shaft installation mistakes. Many errors happen simply because operators lack the terminology needed for ordering replacement parts or performing routine inspections. Familiarize yourself with these vital components:
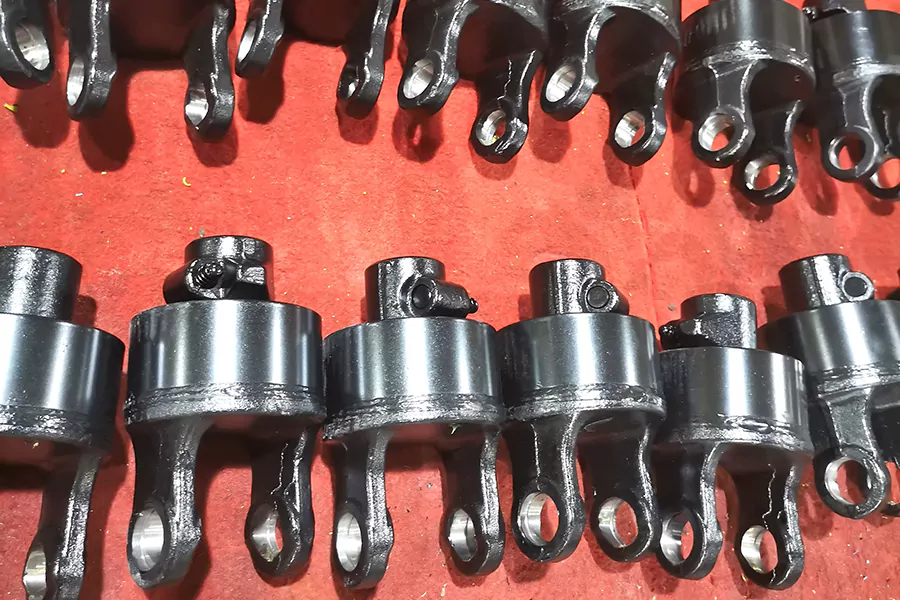
Yoke and Locking Pin: The sturdy, U-shaped end piece. Its locking pin is your primary safety connection point—it must click securely into the tractor’s groove to prevent the entire driveline from flying off.
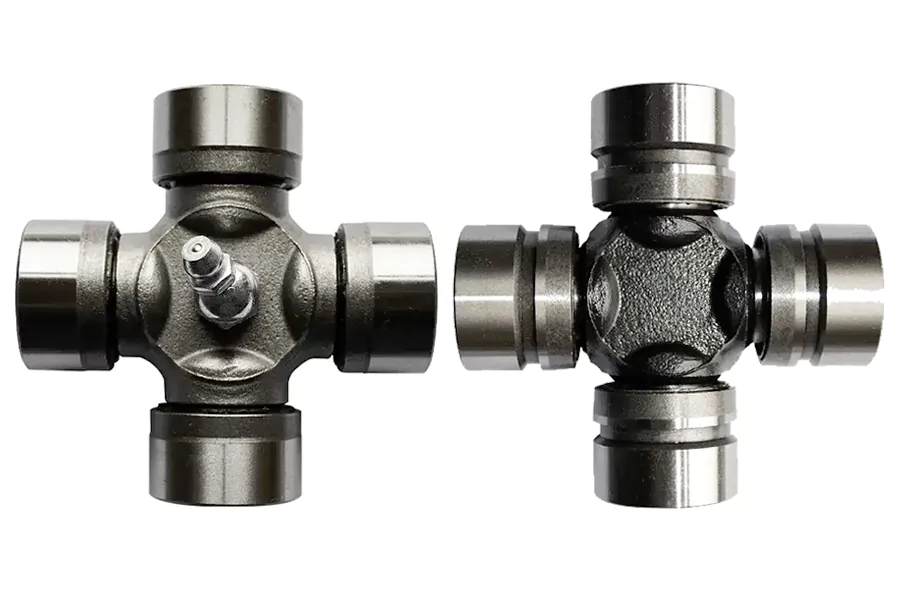
Universal Joints (Cross-and-Bearing Kit): The mechanical “elbows” of your shaft that allow power to transfer smoothly at an angle.
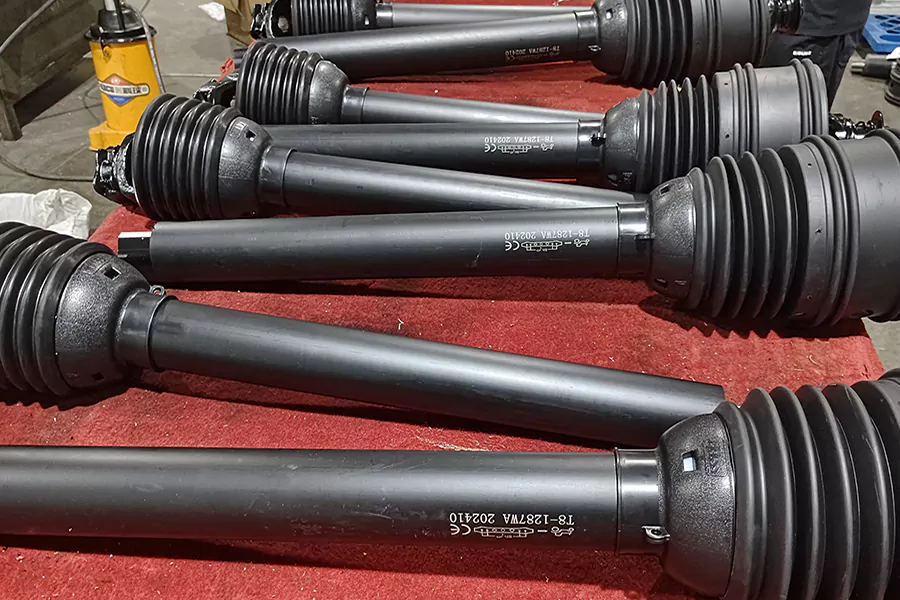
Telescoping Tubes: The inner and outer shafts that slide together like a telescope.
This telescoping action protects your investment. If the tubes lack room to compress, they “bottom out,” acting like a battering ram against your transmission. Furthermore, matching yoke orientation keeps those universal joints spinning without violent vibration.
Safety Precautions Before You Start
I’ve watched a buddy get too casual around a PTO shaft and nearly get hurt—so don’t rush this part. Before you touch a wrench or grease gun, do these things:
- Shut the tractor off completely: No idling, no “just for a second” exceptions. Even a slow-spinning PTO can cause serious injury.
- Disconnect the shaft: Unhook it from the implement so it can’t rotate accidentally. This is the easiest way to avoid a dangerous mistake.
- Secure farm equipment properly:Prop up or fasten mowers, tillers, and balers. This prevents them from moving during maintenance.
- Always wear protective gear: Grease can be messy and metal parts are sharp. Gloves keep your hands clean and safe.
- Inspect the work area carefully: Remove all distractions from the space. Distractions increase the risk of errors.
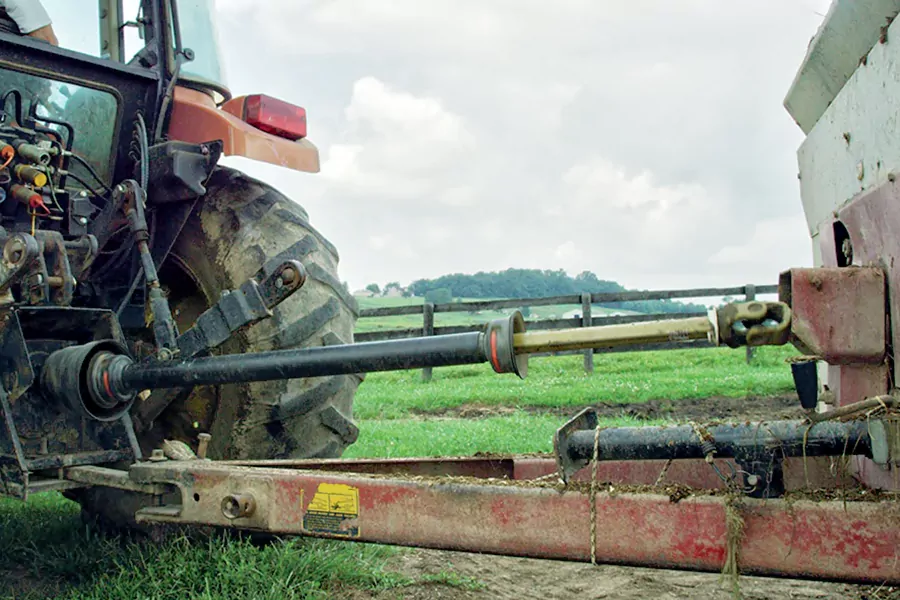
Avoid the 'Internal Crush': Determining Proper PTO Shaft Length and Overlap
You’ve just hooked up a new brush hog, but before engaging the power, you must verify the fit. If those telescoping tubes are too long, raising your 3-point hitch forces them to “bottom out.” This creates a solid steel battering ram that pushes deep into your internal gears, causing catastrophic transmission cracks. Recognizing the early signs of PTO shaft bottoming out—like extreme mechanical resistance during lifting—can save your wallet, but precise prevention is always cheaper.
To prevent this crush, find your equipment’s maximum compression stroke, which is the position where the tractor and attachment are closest together. Knowing how to determine proper PTO shaft length guarantees you meet the correct PTO shaft overlap requirements—leaving enough tube connected to spin safely, but enough gap to avoid collision. Master the “cut-once” technique with these steps:
- Raise or lower the 3-point hitch until the power shafts are perfectly horizontal (this represents the shortest possible distance).
- Begin measuring the distance between the tractor and implement hitches by pulling your tape from the tractor’s locking groove directly to the implement’s groove.
- Subtract two inches from this measurement to ensure your shaft maintains a safe “buffer” gap when fully compressed.
Armed with this clearance data, confidently trim both shaft halves with a standard hacksaw. This precise fit guarantees transmission safety while maintaining the necessary overlap for smooth power transfer.
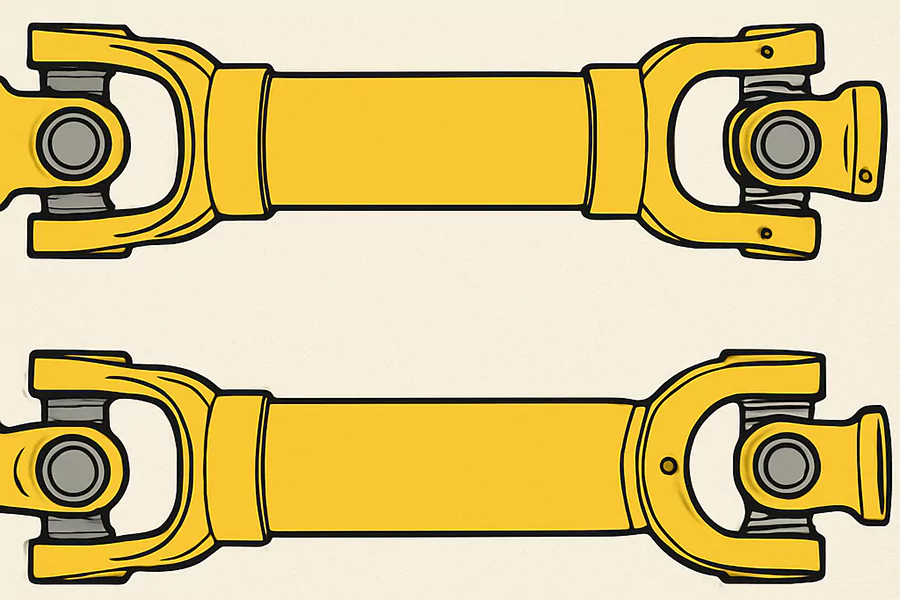
Stop the Shaking: Symptoms of Out-of-Phase PTO Shafts
It usually starts with a teeth-rattling shudder when engaging your brush hog. Many operators blame a bent tube, but these severe symptoms of out-of-phase PTO shafts actually stem from a simple alignment mistake. A spinning universal joint does not move at a constant rate; it actually speeds up and slows down twice per revolution. If your telescoping driveline halves are assembled with a twist, these hidden speed pulses fight against each other, causing the entire assembly to violently buck.
Fortunately, confirming the correct yoke orientation for driveline balance requires just a quick visual inspection. Look at the U-shaped “ears” holding the cross bearings on both ends of the shaft. For power to flow smoothly without fighting itself, the ears on the inner tube must perfectly line up with the outer tube’s ears, mirroring each other like a reflection.
Pulling the two slip-tubes apart and realigning the yokes is the absolute easiest method for reducing vibration in tractor drivelines. This simple phasing fix immediately neutralizes those battling speed pulses, ensuring a quiet, safe power transfer.
Respect the Limit: Why Excessive Angles Cause Premature Wear
Have you ever noticed a grumbling sound when turning sharply with your brush hog engaged? Just like kinking a garden hose restricts water, running your setup at severe bends chokes smooth power transfer. The standard safe zone maxes out at roughly 15 degrees during active operation. Pushing past this limit puts crushing stress on your bearings. Excessive PTO angle definitively causes premature wear. While a severe, stationary angle is perfectly safe while the tractor is parked, running under heavy load in that heavily bent position rapidly destroys the internal metal crosses.
Preventing this damage requires mastering the steps for aligning driveline angles before you start working. When attaching pull-behind tools, adjust your tractor’s drawbar so the shaft runs in a straight, flat line connecting to the implement gearbox. If your property layout requires constant tight turning, consulting a constant velocity joint maintenance guide is wise, as those specialized shafts tolerate sharper bends. Otherwise, keep your standard geometry straight to prevent catastrophic joint failure.
Your Driveline's 'Fuse': Shear Bolt vs. Slip Clutch Protection
Hitting a hidden rock or stump sends a destructive shockwave toward your tractor’s transmission. To stop this energy, equipment uses a mechanical “fuse” to absorb the blow. The difference between shear bolt and slip clutch protection dictates how you properly defend your implement:
- Shear Bolts: Cheap, simple, and sacrificial. They snap instantly upon impact, stopping the power transfer dead.
Slip Clutches: Adjustable friction plates that slip under heavy loads, allowing you to power through rough patches and easily handle restarts.
Making fuse errors ranks among the most expensive PTO shaft installation mistakes. Never replace a broken shear pin with a hardened Grade 8 bolt. If that bolt is too strong to snap, the crushing force bypasses the fuse and shatters your tractor’s internal gears instead. Conversely, slip clutches require “seasoning” after sitting. Loosen the tension springs annually and let the plates slip purposely to burn off winter rust so they don’t seize solid. Mastering these limits, alongside preventing PTO shaft telescoping failure, ensures a healthy driveline.
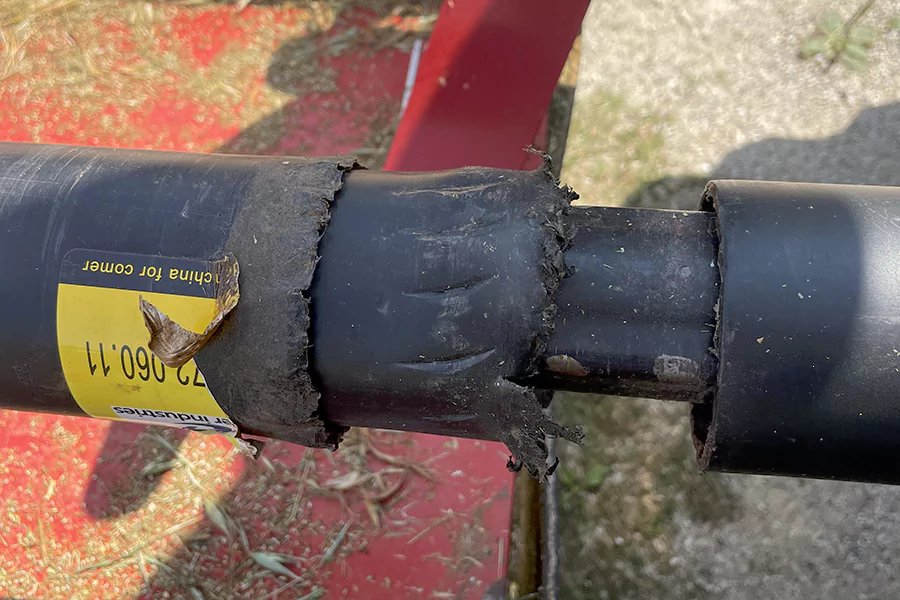
Beyond the Metal: Why Safety Shields Break and How to Prevent It
Your driveline’s plastic cover is the critical boundary between you and 540 rotations per minute. Proper installation troubleshooting means ensuring this guard stays absolutely stationary while the solid steel spins safely inside. This happens via anti-rotation chains, which must clip to a fixed point on your tractor and implement. One of the worst PTO shaft installation mistakes is letting these chains dangle, causing the shield to grab and spin, instantly turning it into a deadly winding hazard.
Safety shields often break even without taking a direct hit due to UV degradation of polymers. Constant sunlight bakes the plastic over time until it turns chalky and brittle. If you spot hairline fractures or the shield’s bearings grind when turned, replace the guard immediately.
The 8-Hour Rule: Proper Lubrication Intervals for Universal Joints
Just clicking a shaft onto your tractor isn’t enough; avoiding costly PTO shaft installation mistakes requires ongoing care. Inside your universal joints sit tiny metal rollers called needle bearings, which crush into dust without a constant cushion of lubrication. Using an improper grease type for needle bearings—like thin, general-purpose sprays instead of a heavy lithium-based grease—ruins them quickly. To protect these joints, always pump fresh grease into the fitting until you see the old, dirty grease “purge” or squeeze out from the rubber seals.
Establishing proper lubrication intervals for universal joints and other moving components extends your equipment’s lifespan. Follow this routine to prevent metal-on-metal destruction:
- U-joints (Every 8 hours): Purge with lithium grease before a full day of heavy work.
- Telescoping tubes (Every 20 hours): Separate the two halves and smear grease along the inner shaft so it slides without binding.
Shield bearings (Daily): Lubricate the plastic guard collars.
Your Pre-Operation Checklist for a Long-Lasting Driveline
Avoiding common mistakes ensures your attachments work with you, not against you. Prevent catastrophic PTO shaft failures by making this 60-second walkaround your routine:
Length check: Does it telescope freely without bottoming out?
Phase check: Are the yokes perfectly aligned?
Angle check: Is the operating angle as straight as possible?
Shield check: Does the plastic guard spin independently?
Lube check: Is there fresh grease on the moving joints?
Taking five minutes for this checklist saves five hours of installation troubleshooting and expensive repairs later. After your next mowing or tilling task, carefully check the joints—cool operation is your ultimate sign of success. Master these physical boundaries, and you guarantee years of safe, vibration-free performance from your tractor.